Drawing a Building
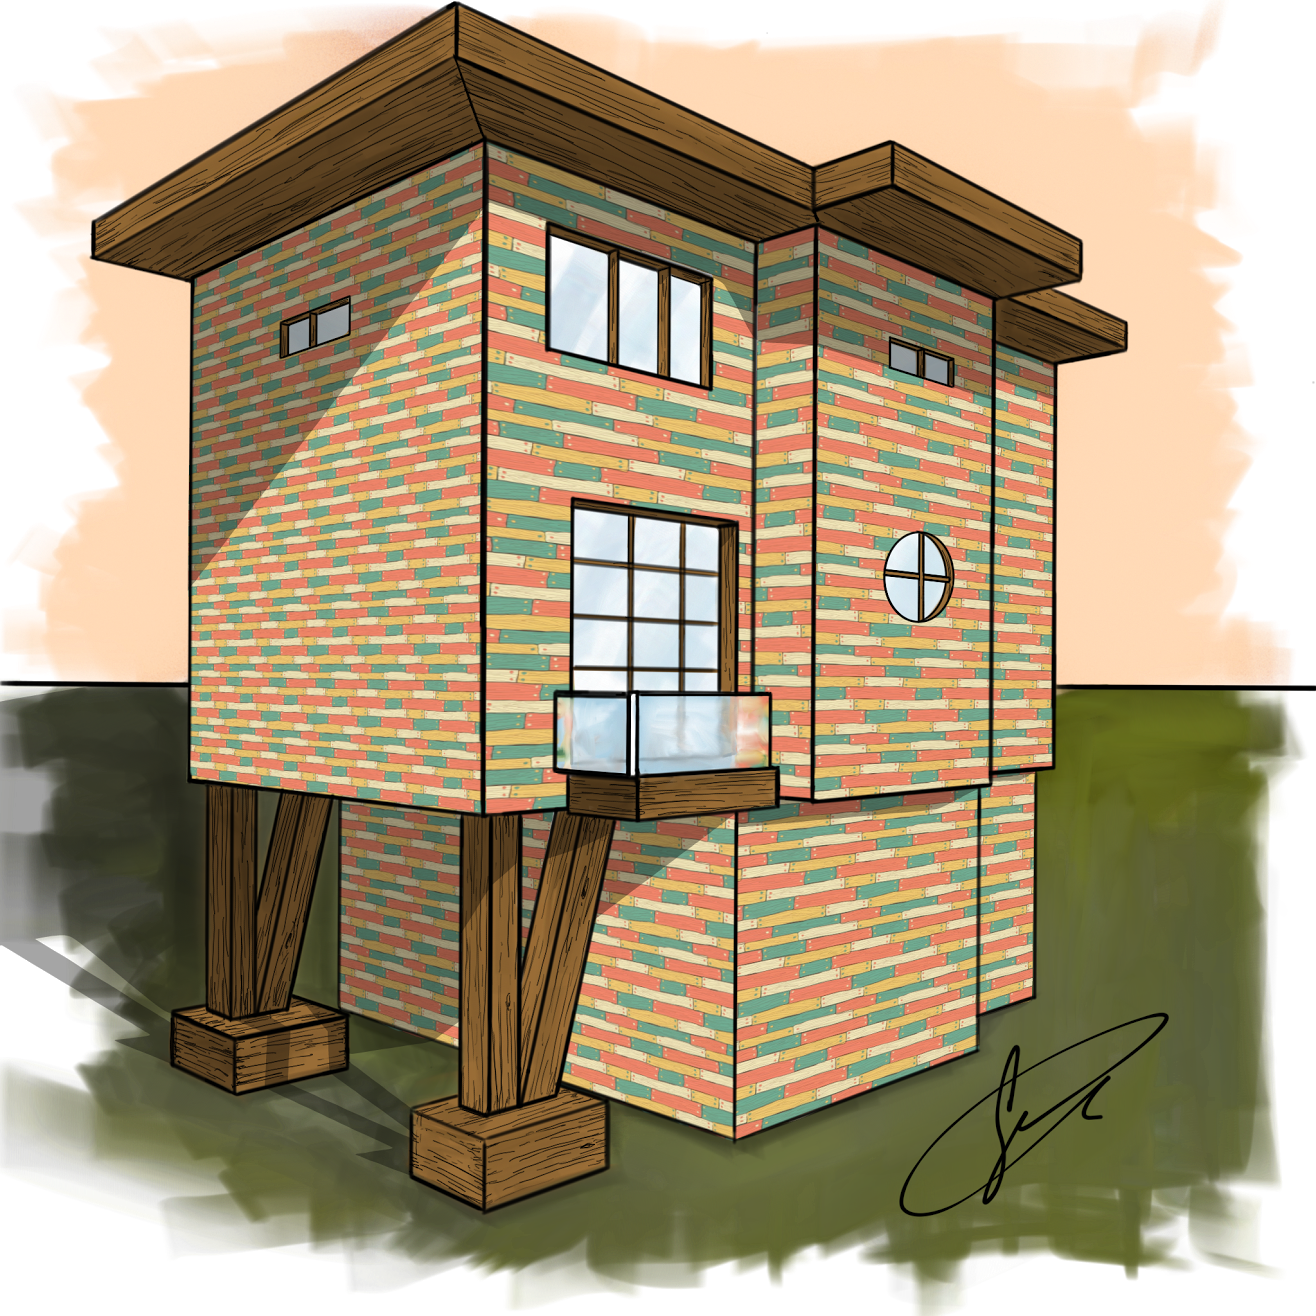
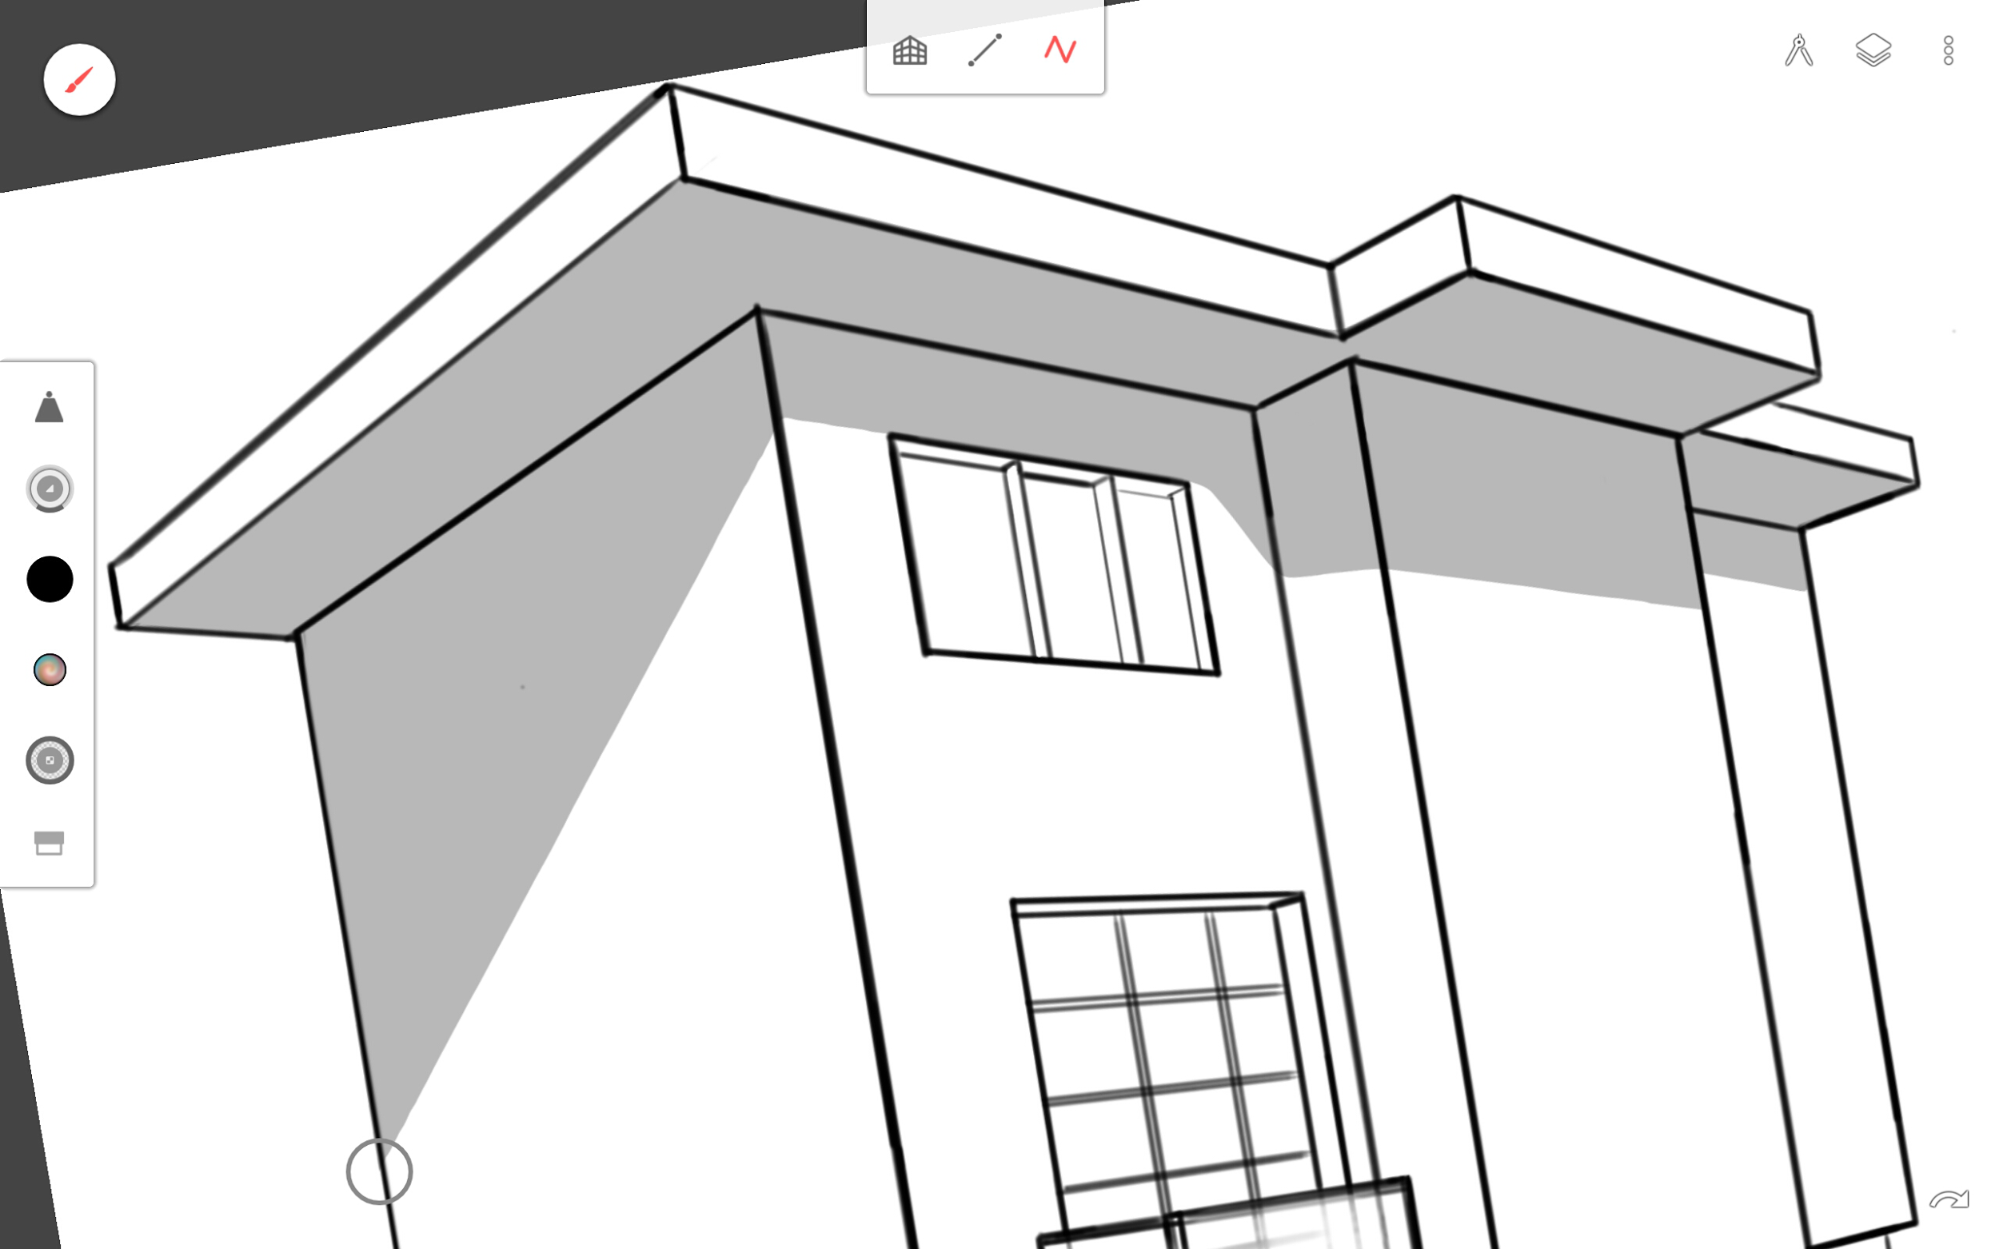
- First, click on the compass in the top-right. If you are using a tablet, you can drag the perspective guide tool icon to the top bar for easy access. We will be using the 2-Point perspective for this tutorial. If you zoom out, you will see two vanishing points. The red line represents the horizon
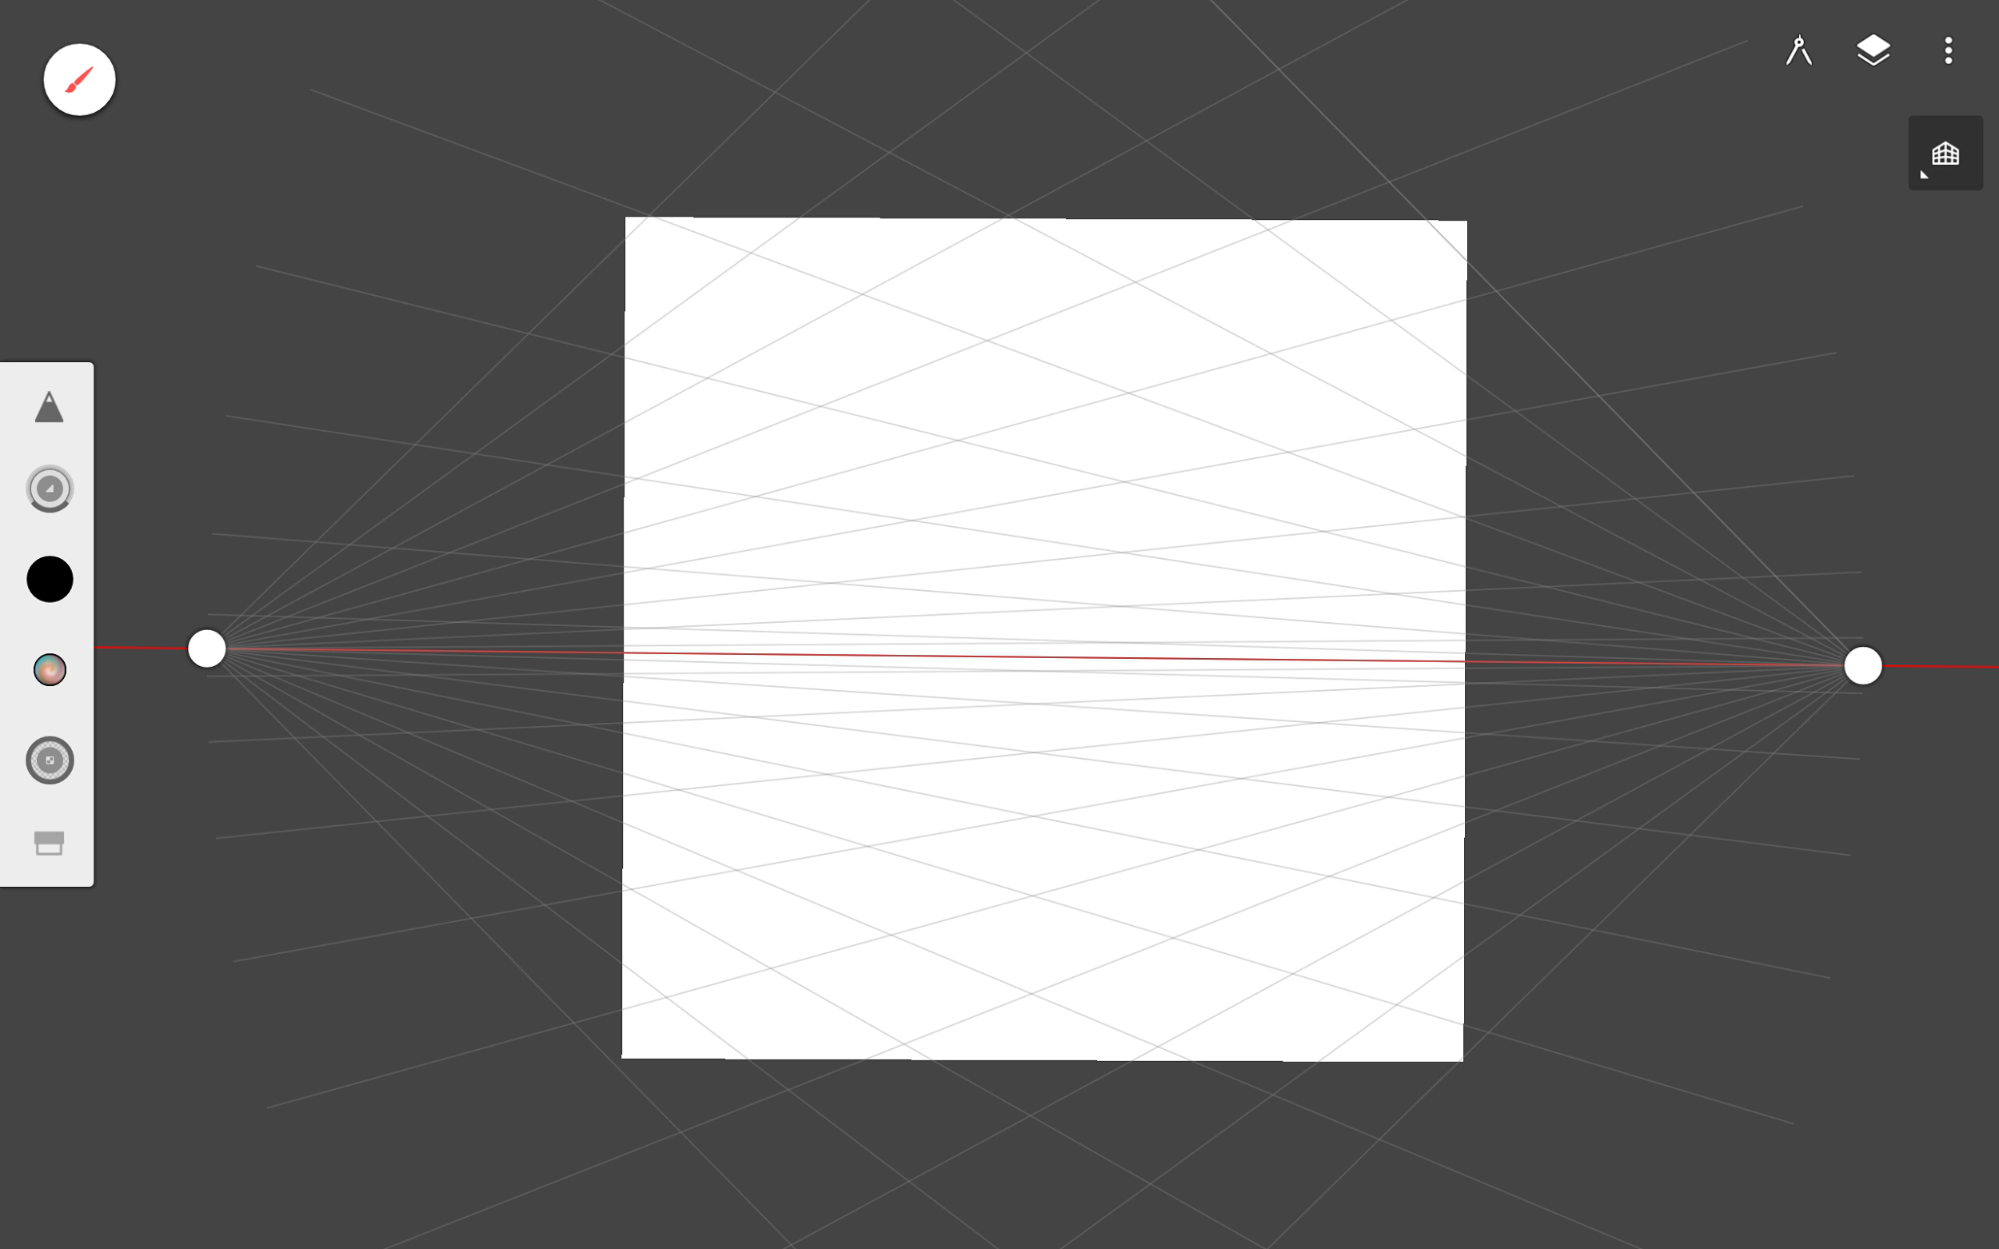
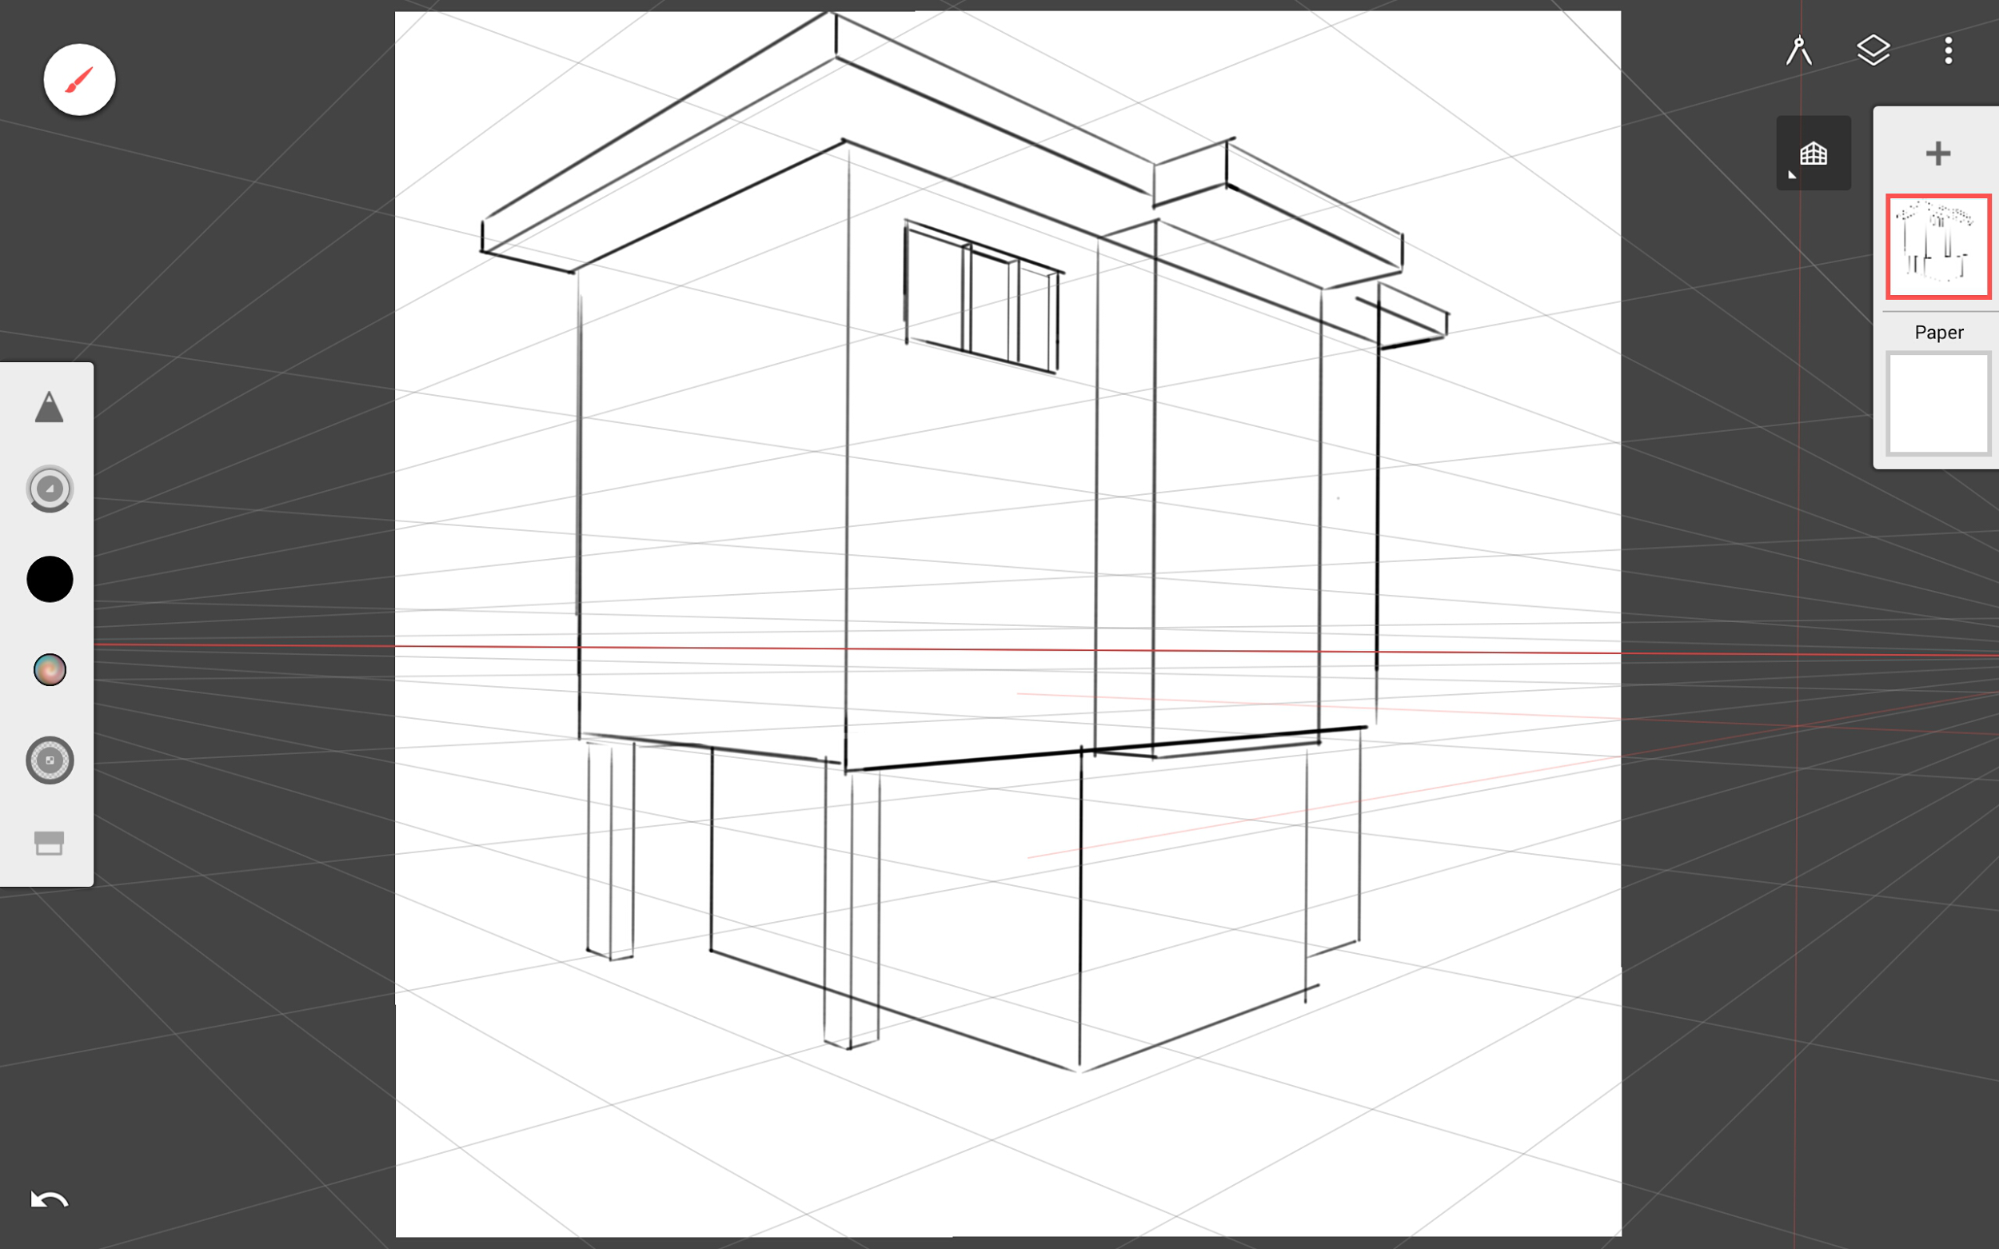
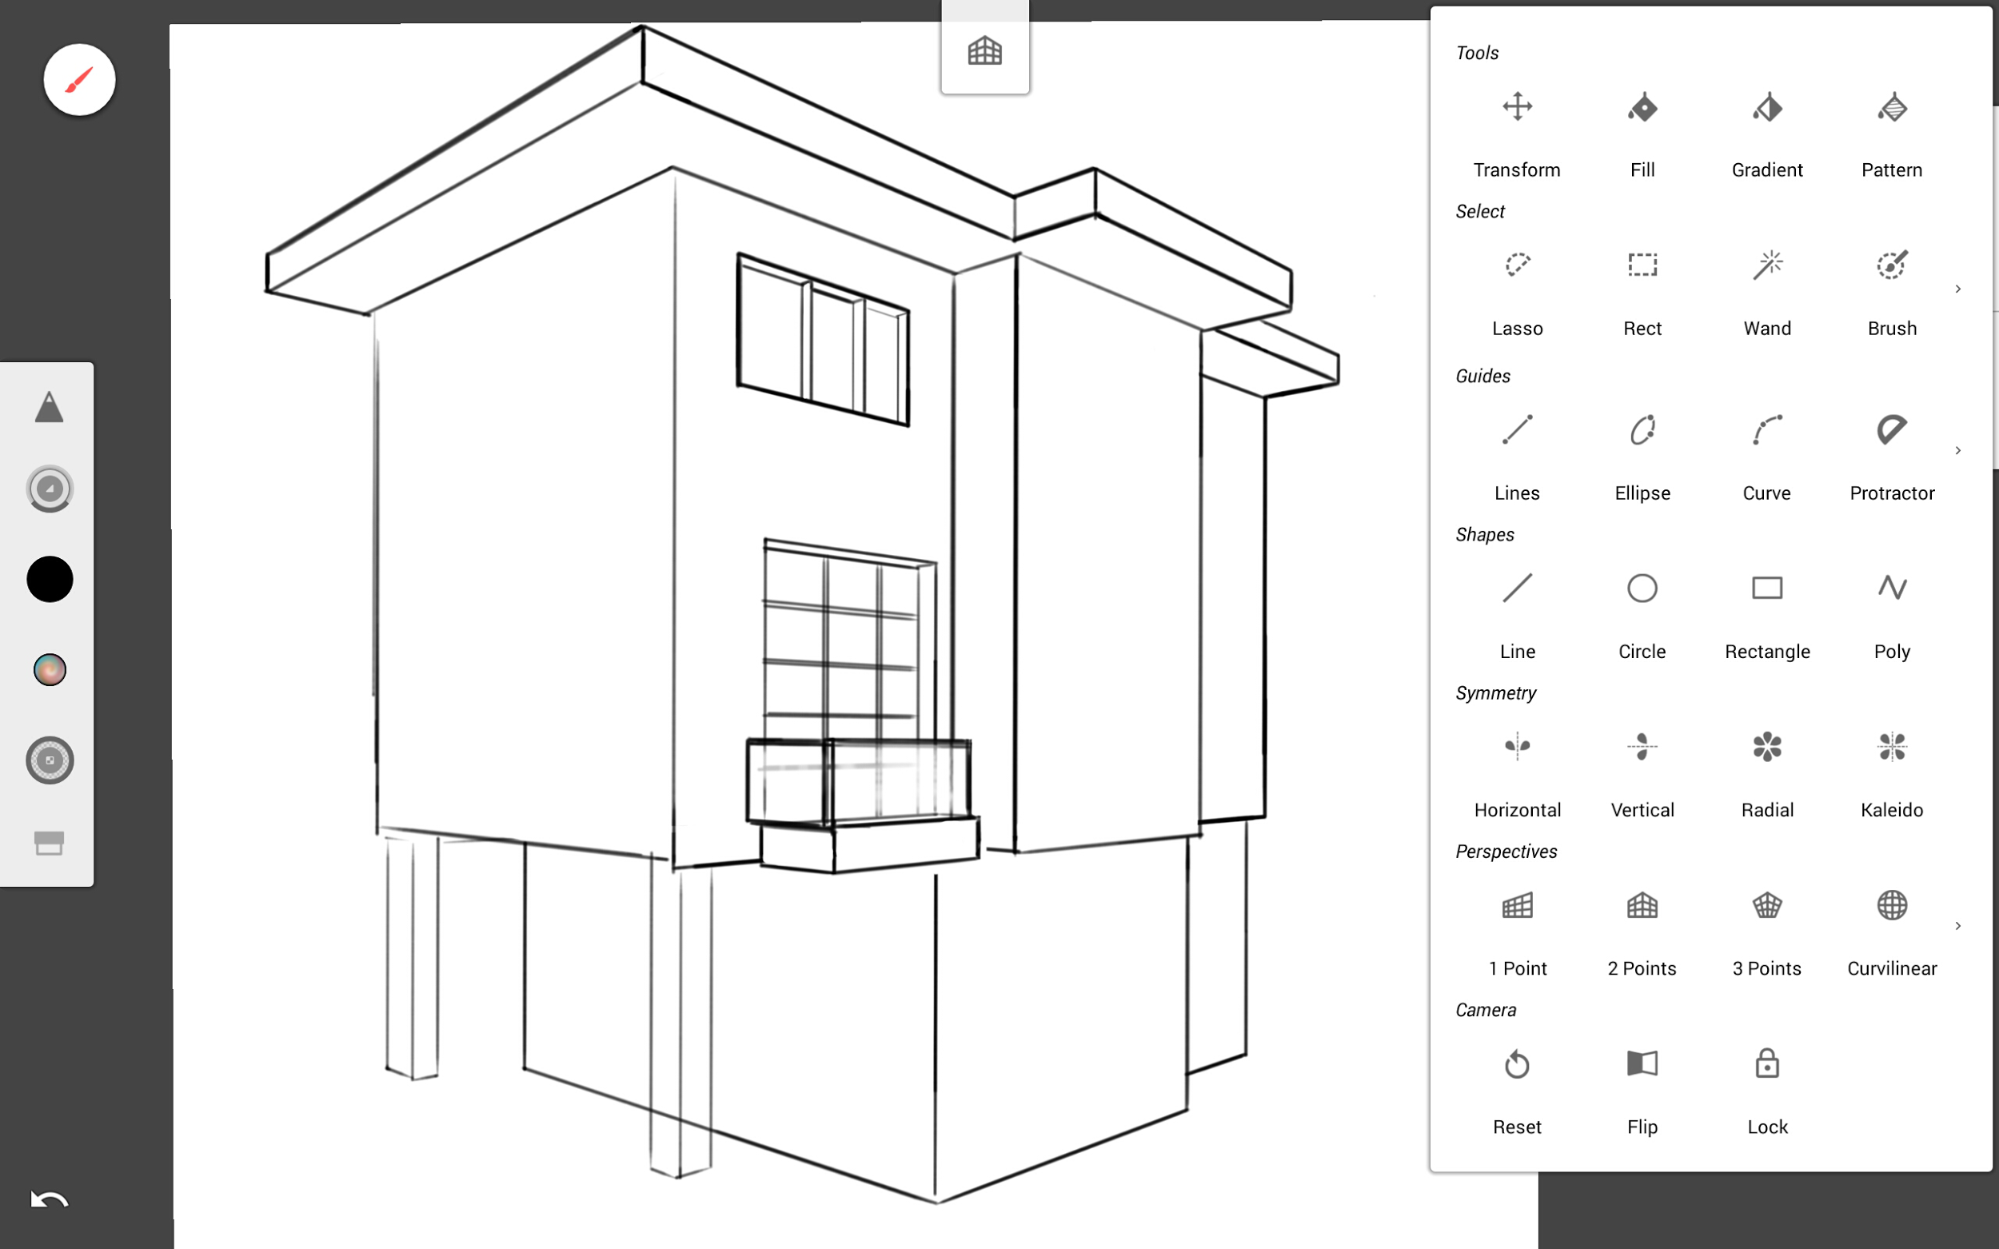
- The perspective guide creates straight lines along three dimensional planes. Sketch out the building’s structure and windows. Take the time to create clean line work so you don’t have to go over it again.
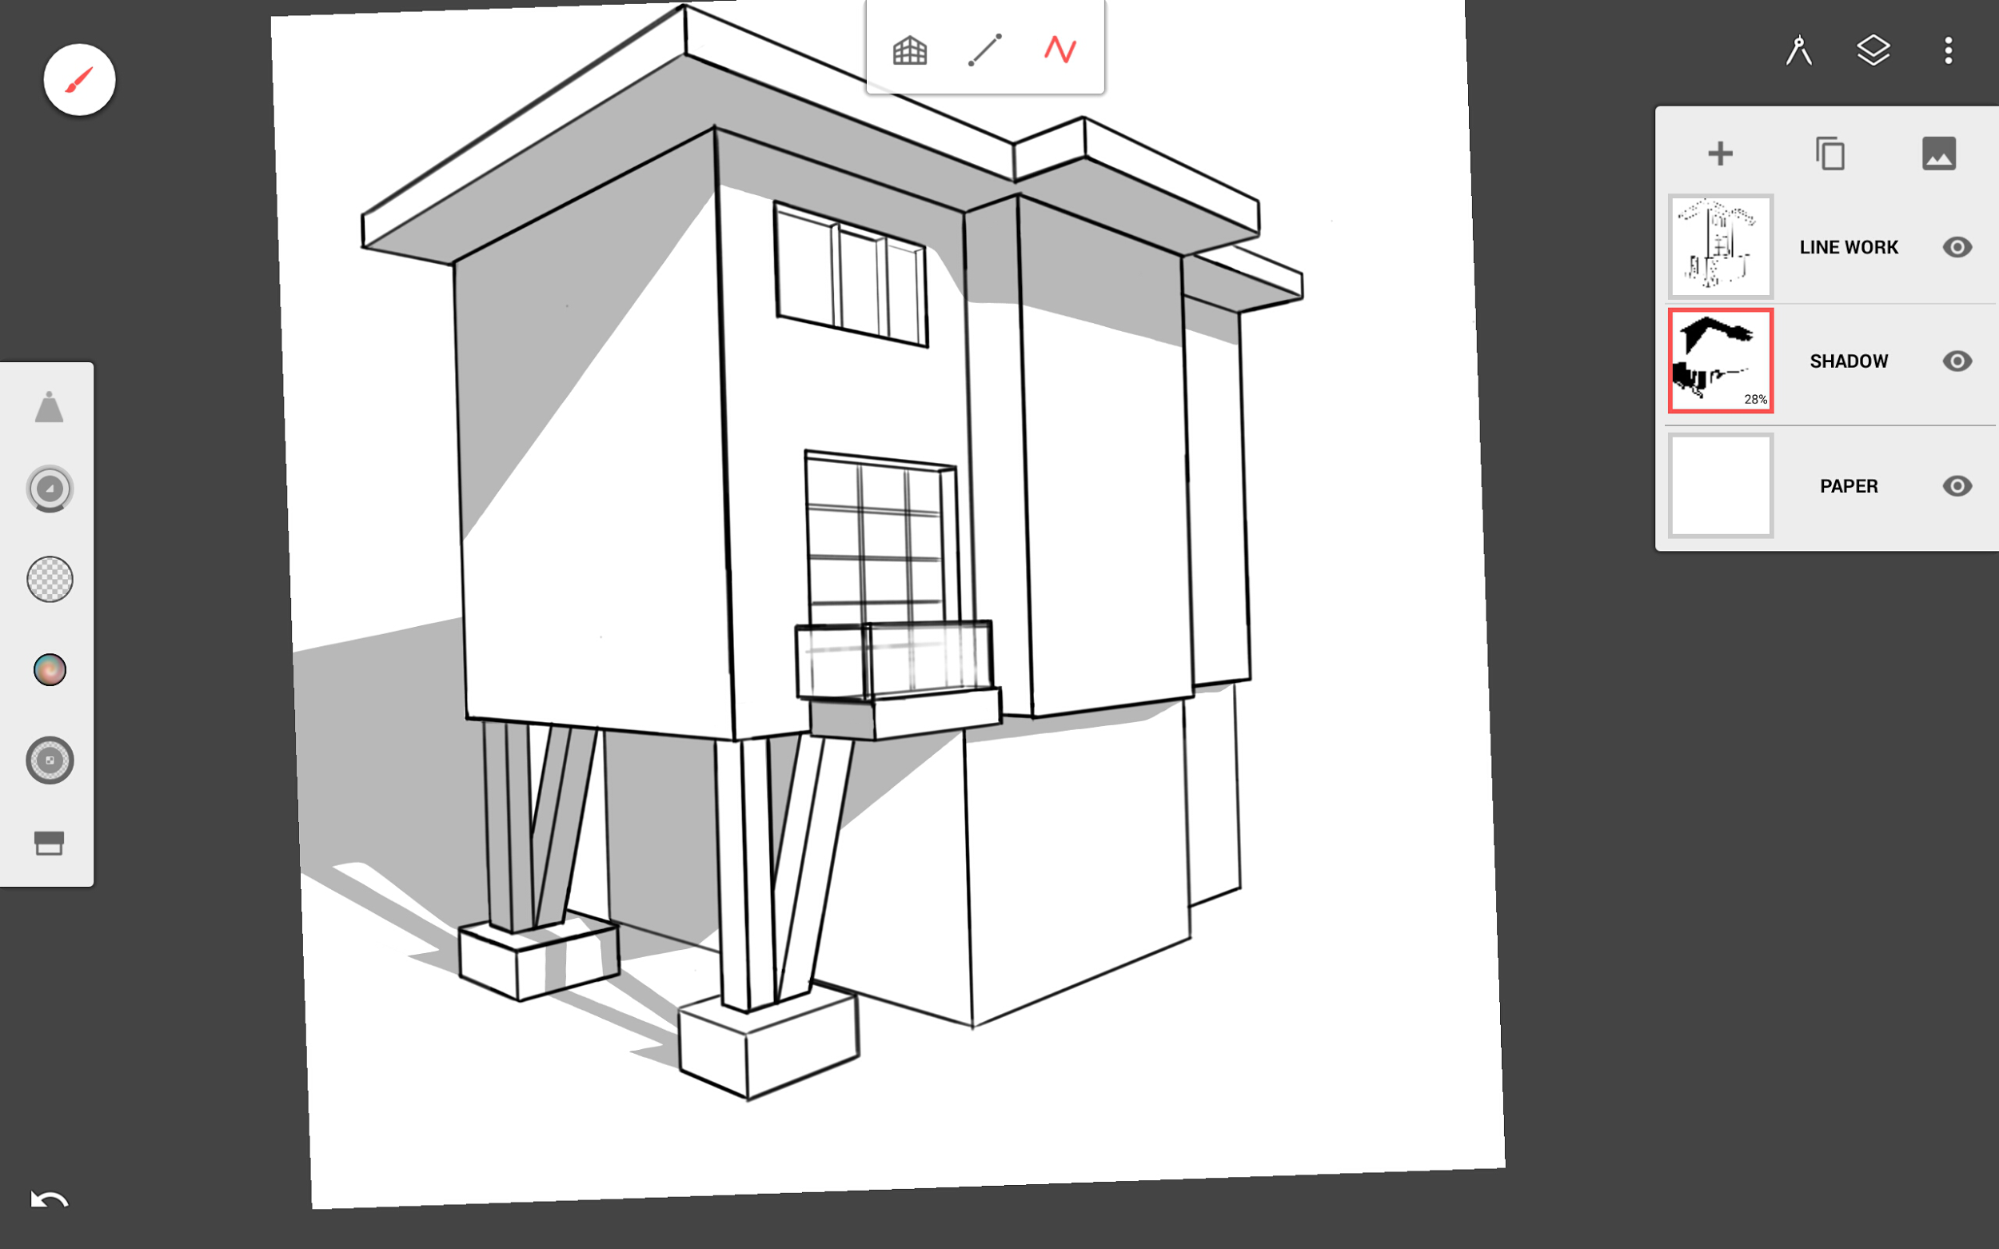
- After finishing the line work, I used the Beatrix brush from the Ink set with the Poly shape tool to block in the shadow. This brush is great for filling in an area with color.
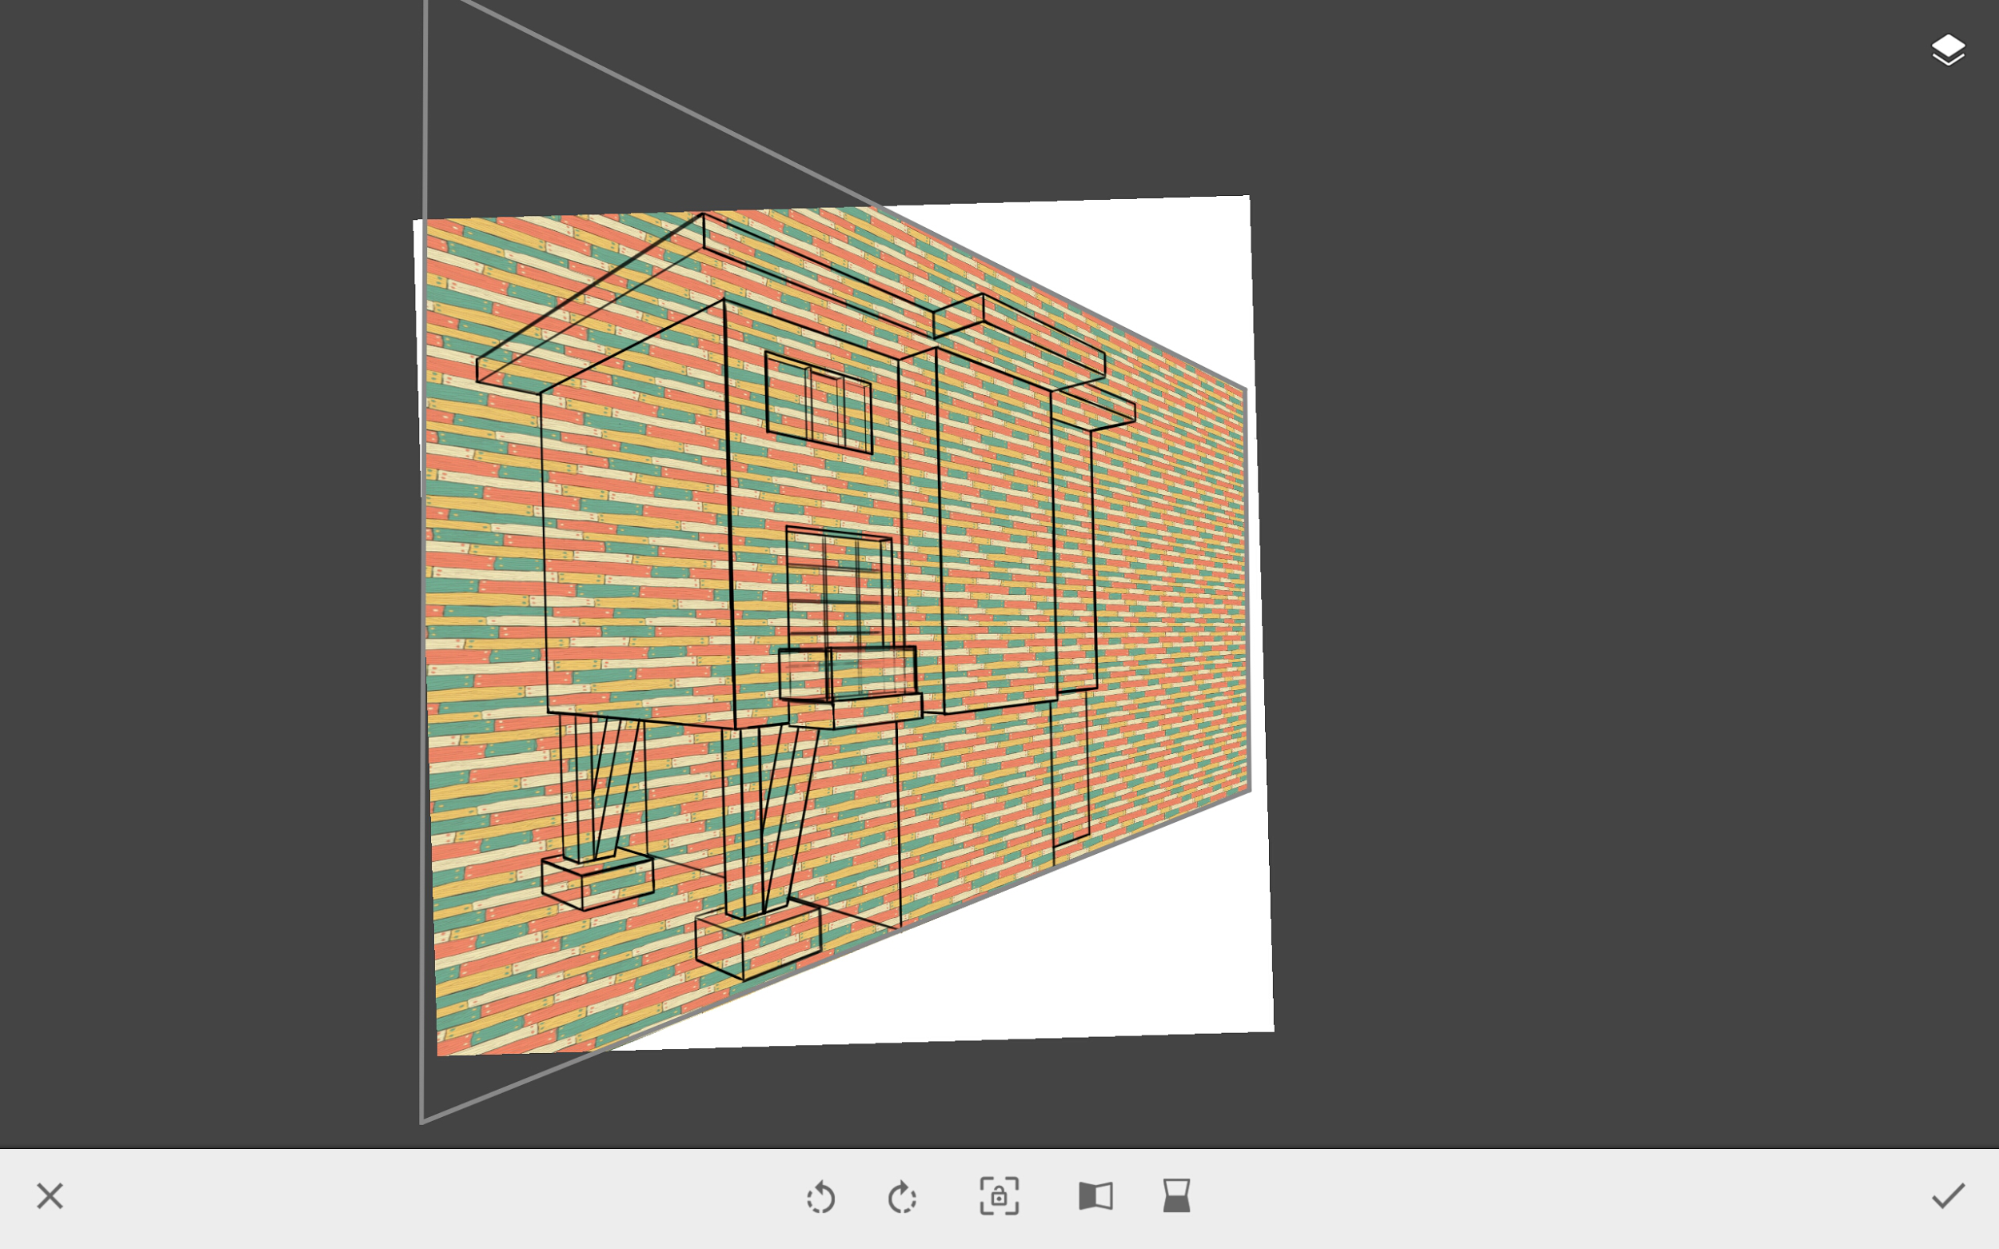
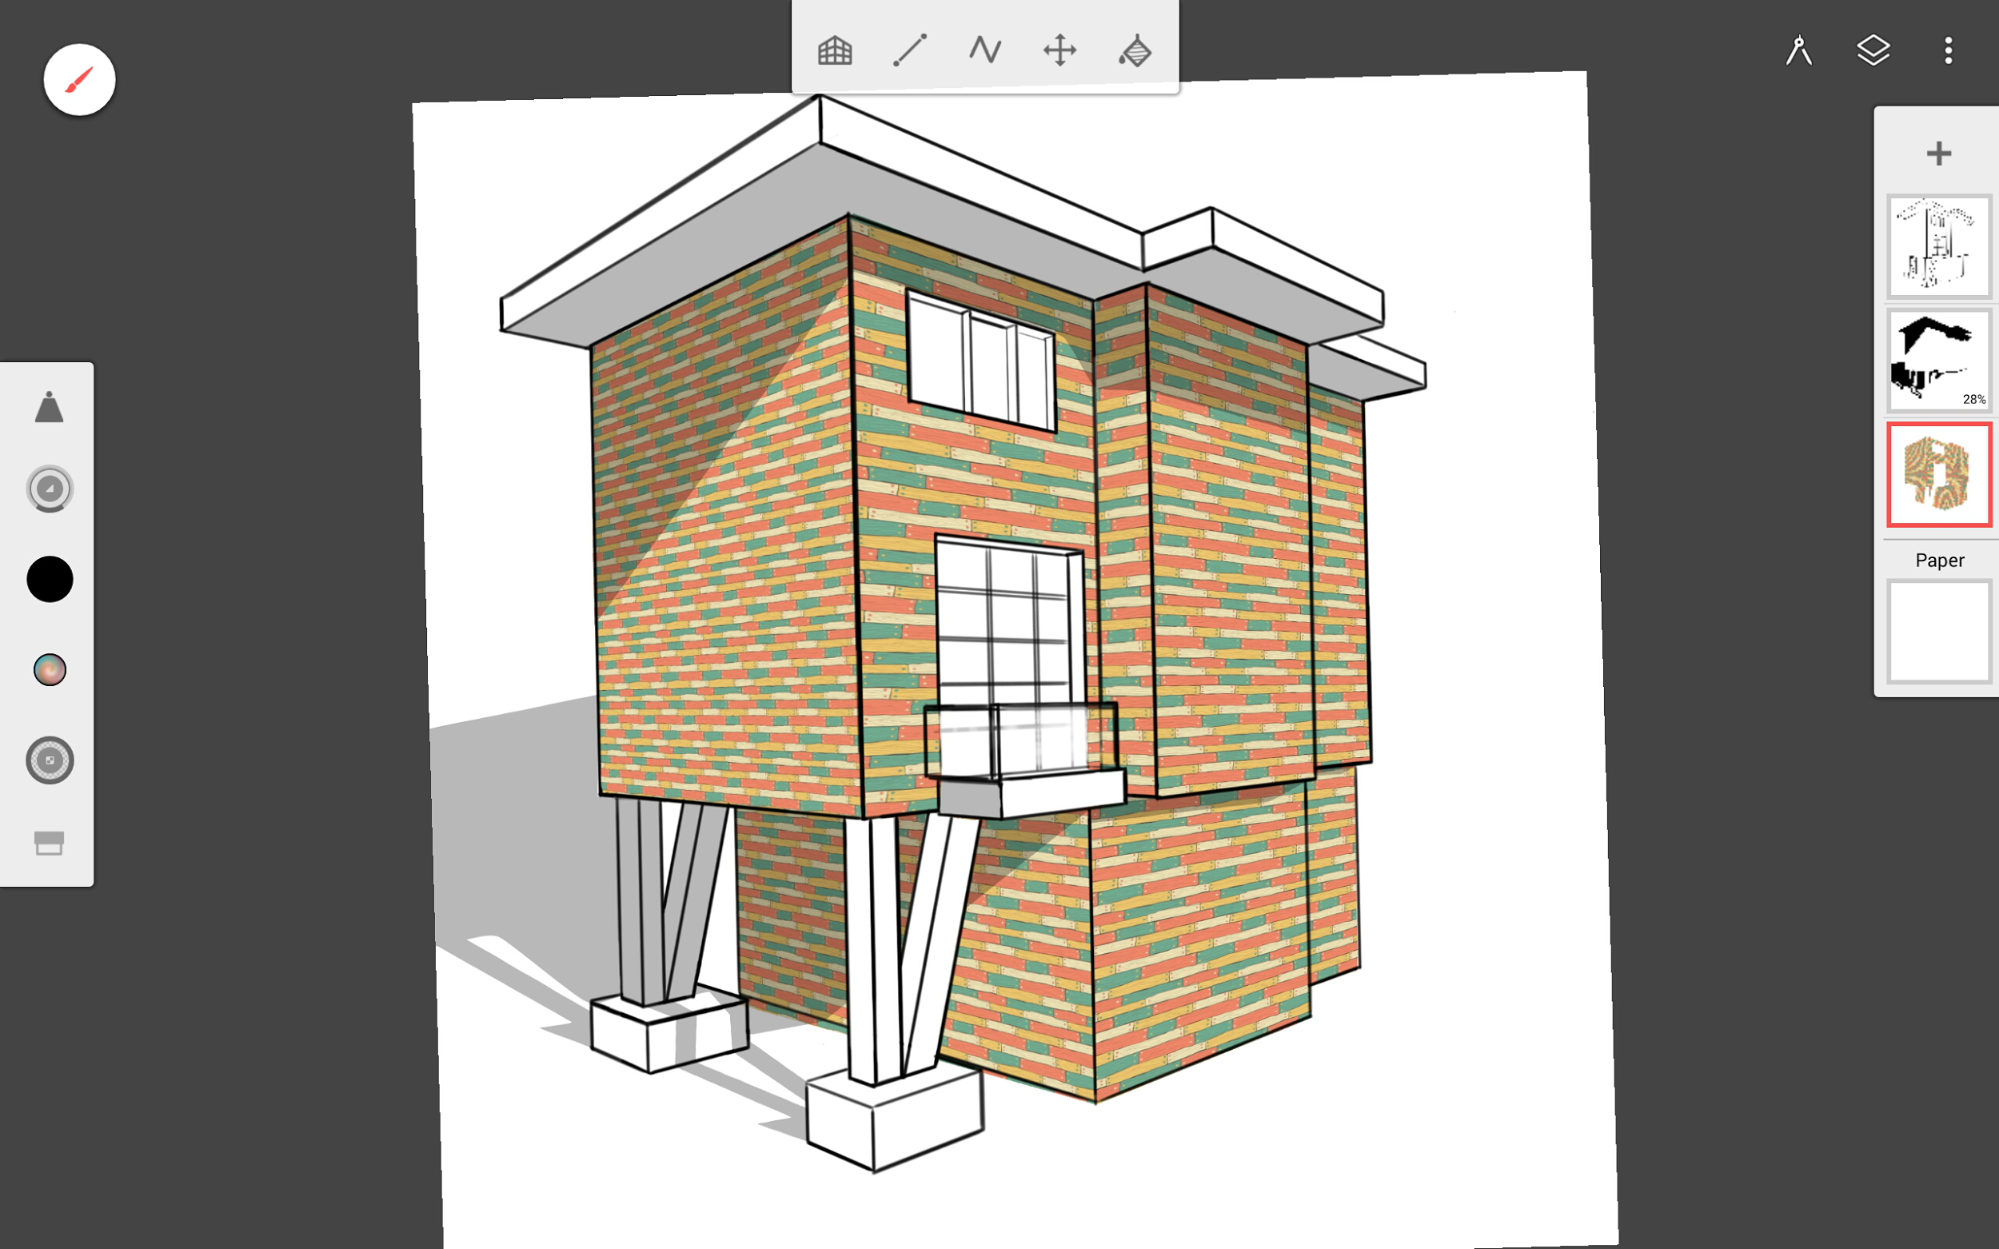
- I wanted to add a wood siding, so I decided to use the Pattern Fill tool. This tool acts like a paint bucket but fills in the area with a pattern instead of a color. I searched for a good wood pattern.

- In order to use a pattern fill in perspective, I created a separate, empty layer and filled it with the chosen pattern. I then duplicated the layer and transformed the first pattern layer. Click the center lock icon when transforming to unlock proportions. This way you can pull the corners and distort the pattern to match the perspective grid.
- I then erased the areas where the pattern should not be applied.

- I repeated steps 5 and 6 for the other walls.
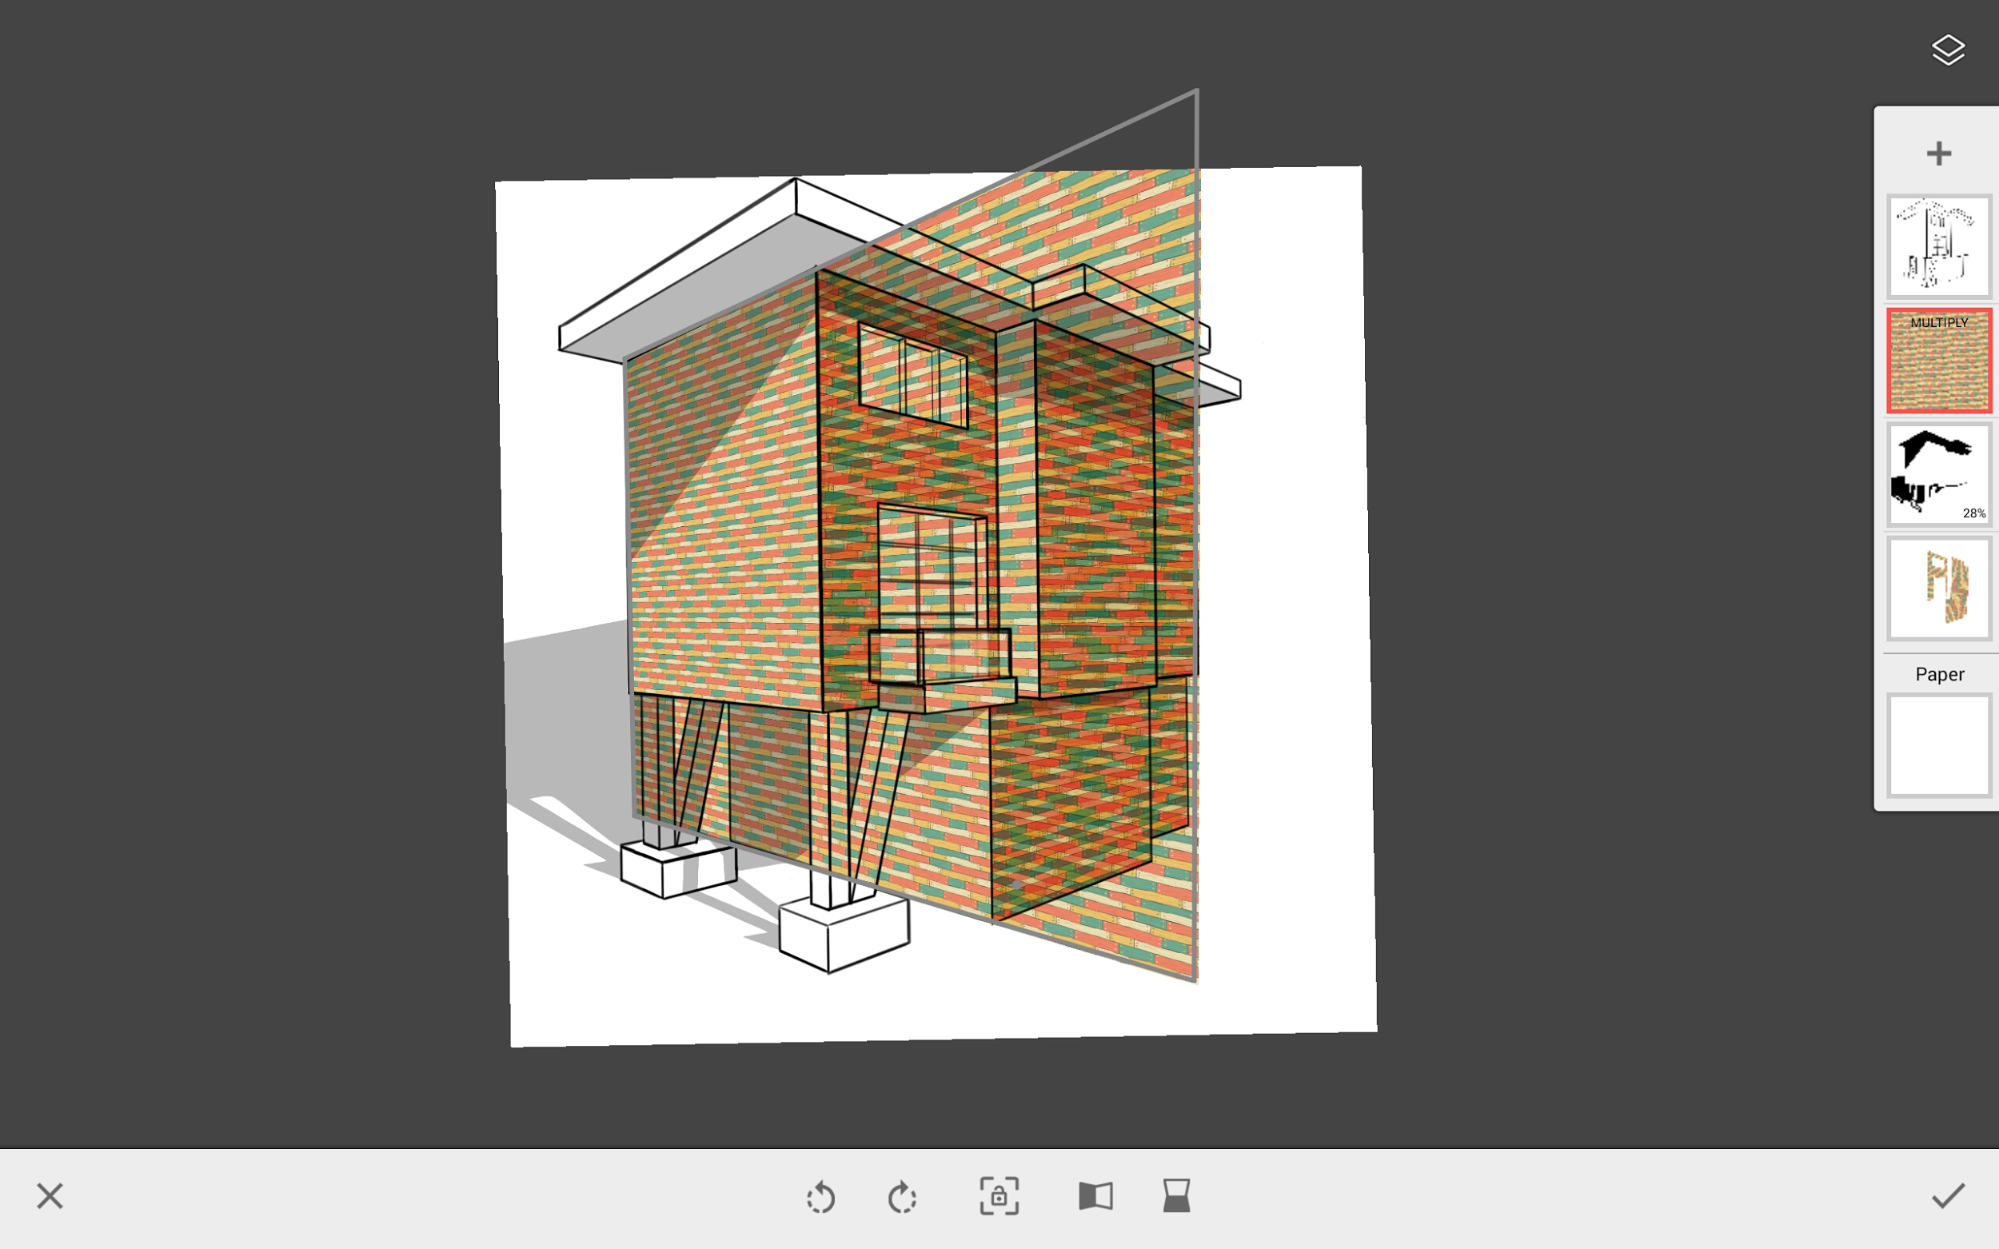
- Yay! Now we have a nice-looking siding on our building.
- I realized there are very little windows so I decided to add more. I turned off the pattern layers and created a separate layer to help with alignment. I used a blue color to help plan out my new windows.
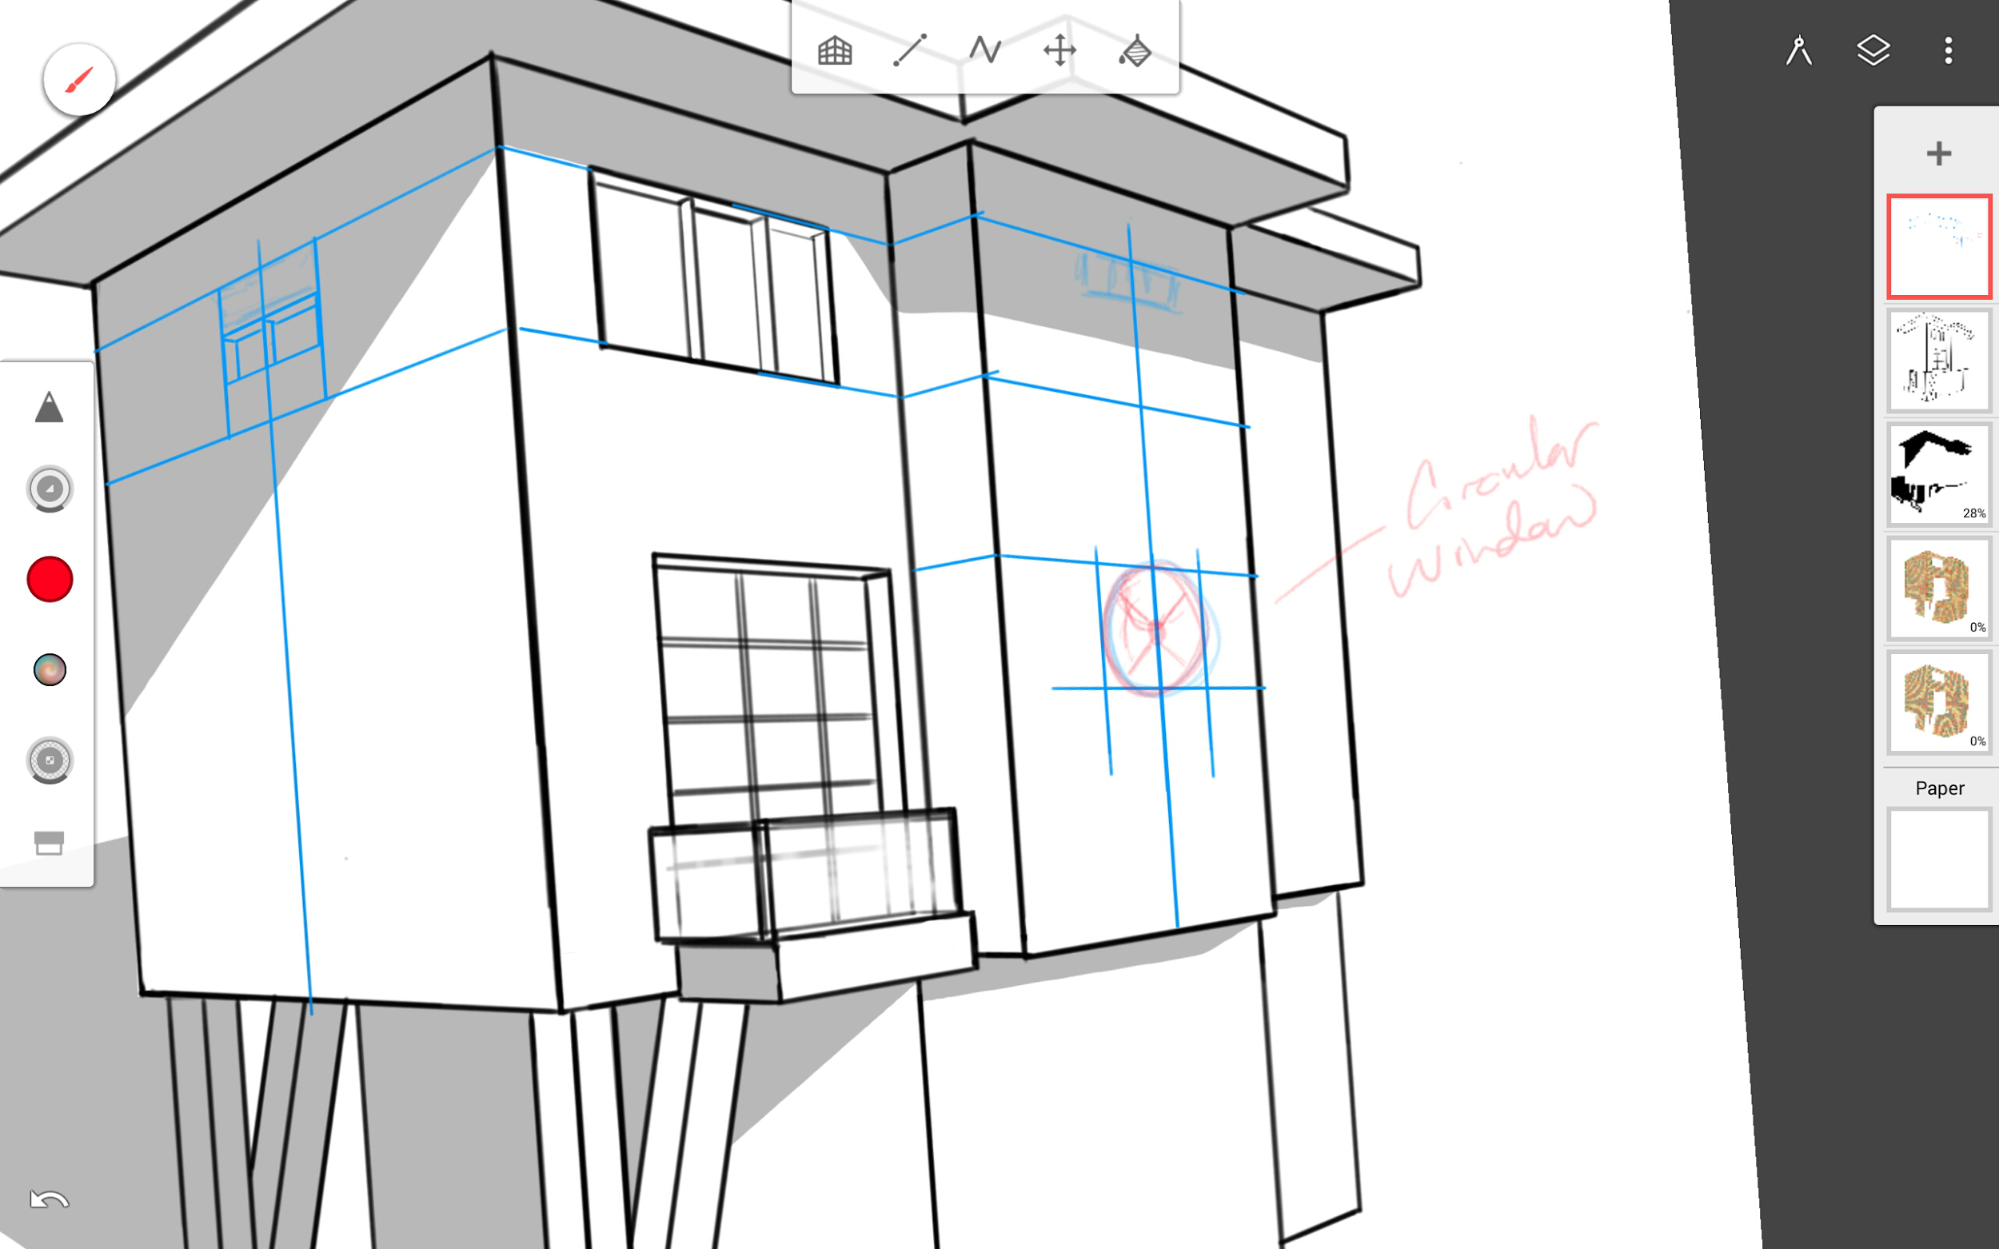
- I used the Ellipse guide to help with the circular window.
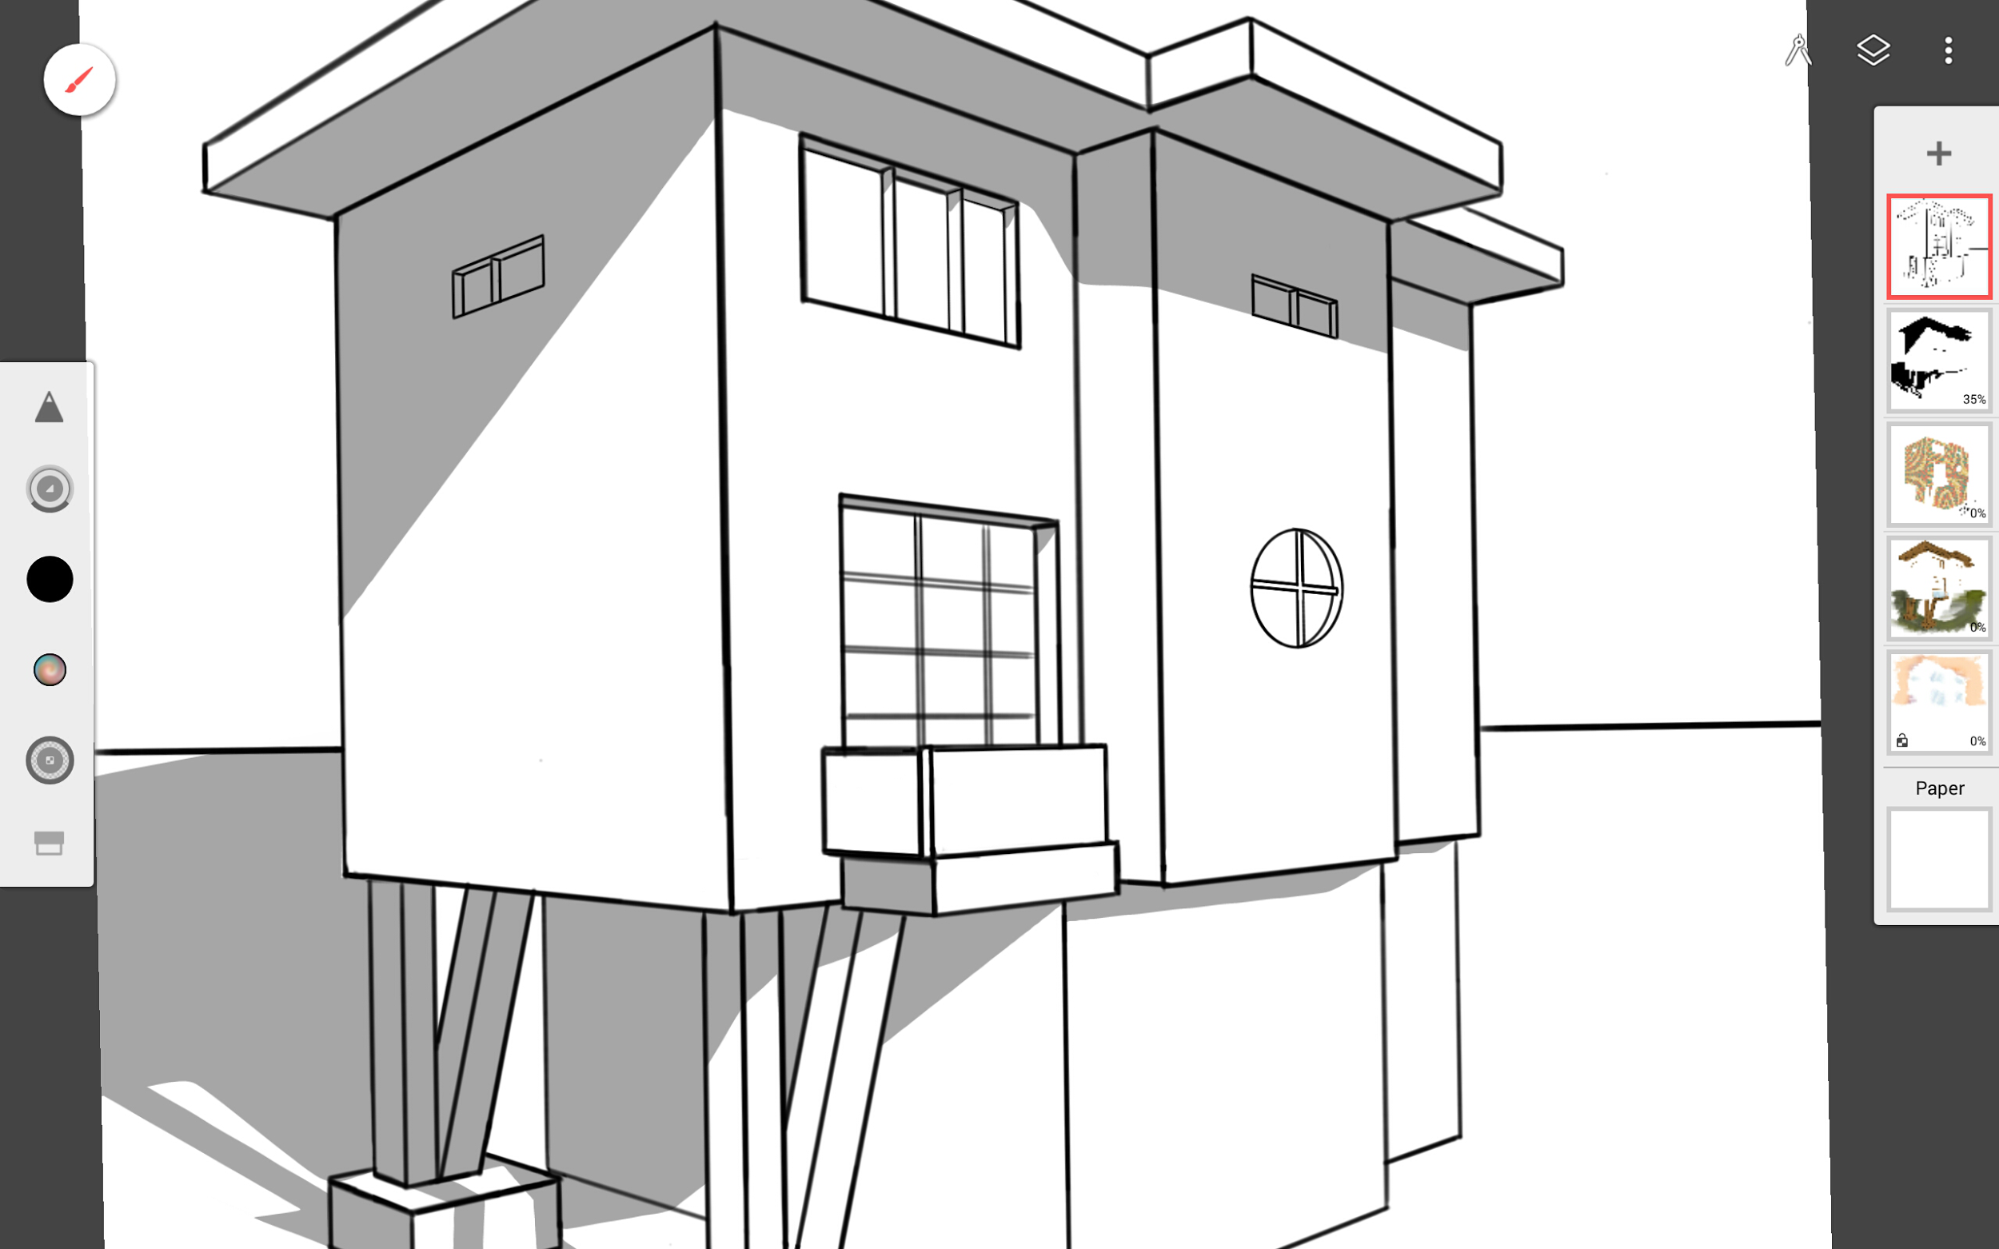
- I then finished coloring in the rest of the painting.