Infinite Painter 5.0
Infinite Painter has no specialized tool for creating drop shadows, but creating the effect with existing tools is quite easy.
This tutorial assumes that you are familiar with the interface of Infinite Painter and have all the tools unlocked.
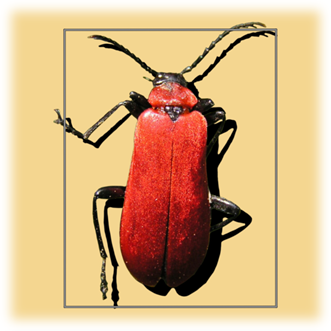
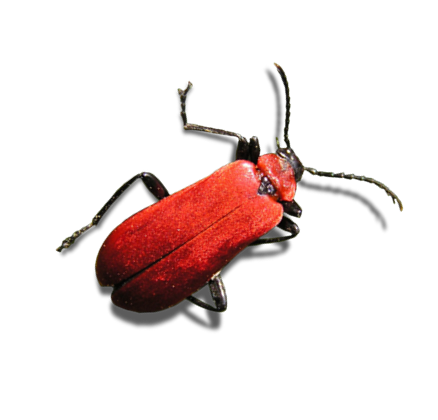
Note that drop shadows look realistic only with opaque graphic motifs having relatively well defined boundaries (edges). Your object should be placed on separate layer with Normal blending mode.
In short, we are going to create, beneath the source object layer, a semitransparent dark shape duplicating boundaries of the source, and having slightly blurred edges.
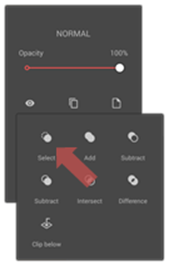
In Paint mode tap on the source layer's thumbnail to open Layer Options popup. Tap … icon for advanced options and then tap Select. This selects everything on the source layer what is not transparent, so if there were semi-transparent areas on that layer, they will be selected partly.
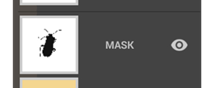
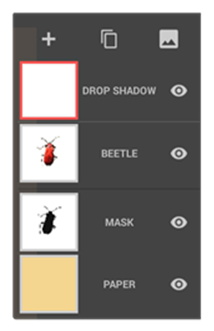
You should notice new special layer named ‘Mask’ appear right over ‘Paper’ layer and the background should turn pink (this is because default mask display is in red and 50% opacity. The mask indicates the area which is not selected and is editable; however we will not use this feature in following process.)
Still in Paint mode, tap the + icon on top of the layer palette. You should see a new layer thumbnail above the current (source) layer. We will temporarily leave it above. Keep this layer active; active layer has red border around its thumbnail.
Tip: You may wish to rename the layer (e.g. "Drop Shadow") by tapping on its name in extended view of the Layers panel. If the palette does not show layer names, just swipe left to extend it.
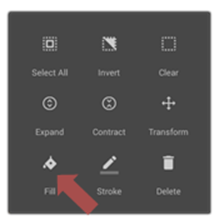
From the Select menu (which appears next to Tools on the top bar whenever there is a mask/selection active) select Fill command. From the color picker pick black color (or other dark color of your choice), tap OK.
The selected shape on the new layer should be immediately filled with solid color you picked. The color is much too dark now for a realistic shadow; it is intended.
Turn off the selection by tapping the small red selection icon next to the mode selector. The pink tint in background should disappear.
As we will not use the selection (mask) anymore, you can also clear (remove) the selection by Clear command from Select menu (this may be invoked also from Mask layer options or simply by long press on selection indicator icon.)
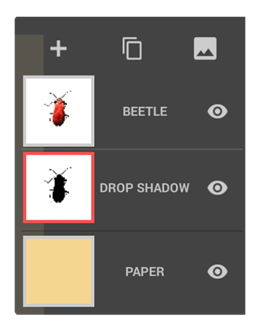
In the Layers palette, long press and drag the ‘shadow’ layer thumbnail down, in order to place it below your source layer. Now the black shape should be completely obscured by the source object.
Having the ‘shadow’ layer still active (and invisible below the source object) select Transform from Tools menu. You should see the bounding box around the source object. Make sure that the padlock icon on the bottom bar is in locked position. Drag from the center of the bounding box a small distance, you should see the black shadow shape moving from beneath your source object. Dragging carefully, place the shadow a little below the object. You will be able to correct the position later. Confirm the transformation.
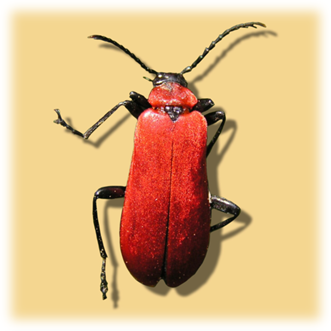
You should have already a kind of drop shadow behind your object, but it is still far from being realistic.
Go to Edit mode. The shadow layer should be still active.
From Filters, choose Blur. In the filter editor, drag the slider to the right until the shadow edges get enough blurred. Do not confirm the action yet. The shadow is probably much too dark.
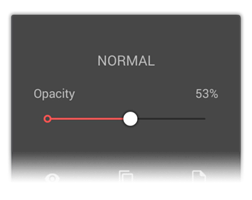
While still in the Blur filter window, open the layers palette and tap on the ‘shadow’ layer thumbnail. In Layer Options, use the opacity slider to adjust opacity of the shadow.
Now you can return to the blend filter slider to correct the amount of blur. Until you confirm the effect, you can play with blur, opacity and layer blending modes to make the effect fit your purpose.
Confirm the Blur filter.
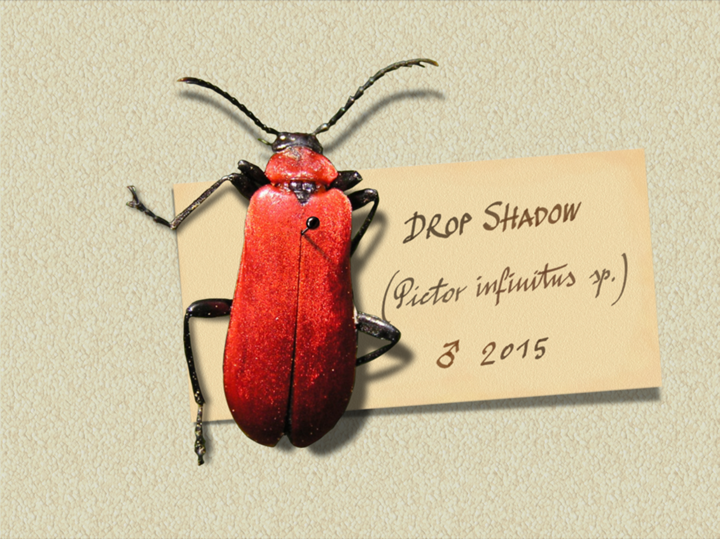
The drop shadow effect is ready.
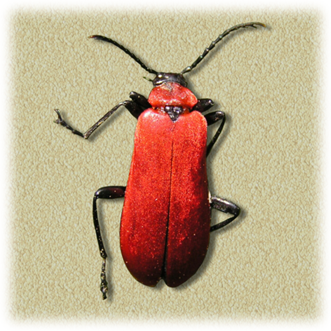
Optionally add a custom background on a separate layer to complete the composition.
At any time you can reposition the drop shadow if you feel it needs it, going back to Paint mode and using Transform tool.
In most cases in Infinite Painter you should leave the drop shadow on a separate layer until the project is finished. If you need to transform (reposition, rotate, scale) the object along with its shadow, Transform tool allows multilayer transformations. If, for any reason, you need to merge the shadow with the object layer, use Merge command from layer’s option menu.
Use Multiply blending mode for drop shadow layer for even more realistic effect.
From the Layer Options, tap on the blending mode selector (reading 'Normal' at the moment). You should see the list of the possible blending modes displayed along the right edge of the screen. Select Multiply blending. Note that you can adjust the opacity while selecting the blending modes.
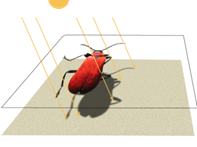
In reality, three-dimensional objects cast shadows in more complicated way. You can use Painter’s transform tools to deform drop shadow layer in a way that will better follow the rules of optics and add some editing to make it even more convincing. Where the object is closer to the background surface, the shadow should be closer to the object, darker and less blurred.
Note that simulated drop shadows create best illusion of depth when the imaginary source of light is placed above the composition, so the drop shadow is slightly below it. Also, when the composition contains more than one drop shadow, they will look more convincing if they follow the same position of the imaginary source of light (simply speaking the position of the shadows relative to their source objects). Of course you may wish to break those rules for any reason.